I'm deep into the process of assembling my experimental bodice at this point. Inevitably, it's rather more complicated than I'd expected. Totally vindicated on my decision to make an entire practice dress before playing with the silk.
Take the fabric sandwich, for example. You've got your outer shell of fabric, which is what people will be able to see when you're wearing the dress.
You've got your lining.
And then there's the padding sandwiched in between the two.
Because I'm doing all of this by hand rather than with a machine, I'm able to use the "period"[1] construction method of assembling the outer shell and lining separately, hemming each of them, and then whipping them together all the way around the edges. It makes for much smoother joins and also means that the lining is removable (and therefore can be washed separately[2]).
My original plan had been to sew the padding directly to the shell of the lining. No dice, though. You see, when you're pad-stitching, the fabric layers pick up a slight curve from being draped over your hand.

That curve needs to follow the curve of the body. In this beautiful diagram (or not!) you can see the curves of fabric over the bosom.
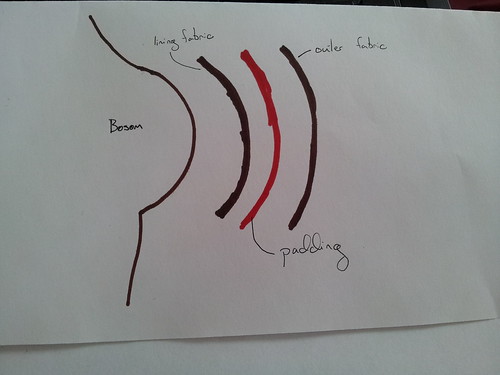
When pad-stitching, you work with the outside edge of the curve uppermost in your hand, as indicated by the arrow:
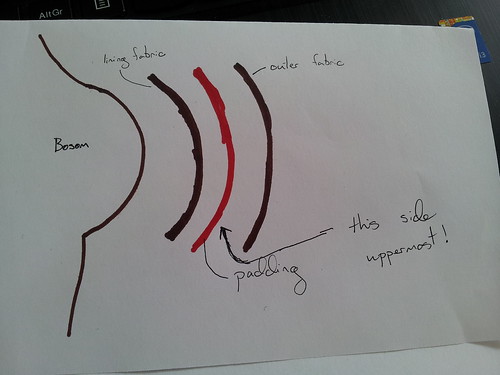
However, bodies go out AND in. We are not spheres. (Thankfully - just think of all those curved seams to make clothing!) Imagine, then, that the line of fabric continued down the body and dipped in under the bustline before going out again. You'd need to pad-stitch from the opposite side of the fabric.
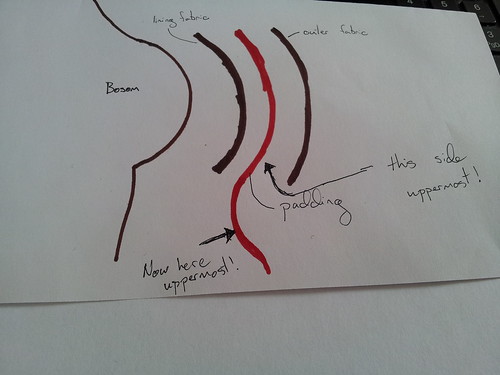
If you were attaching the padding directly to the lining, you'd get unsightly chicken scratching thread lines all over the inside when you swapped to the reverse for the curves, and that wouldn't do at all. Fortunately there's a solution - more fabric!
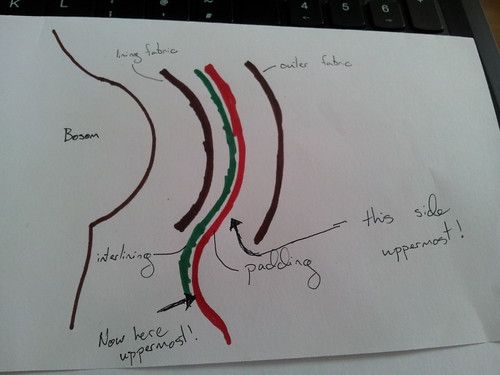
Instead of attaching the padding to the lining, you attach it to an interlining (shown in green above). That way you can sew the curves from both sides and then it all gets hidden between the outer shell and lining fabrics. Delicious, delicious fabric sandwich. Mmmmm, interlining...
Anyway.
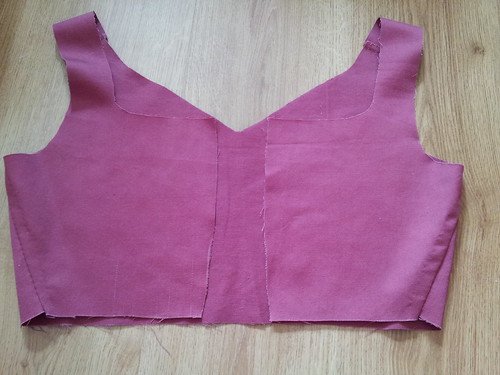
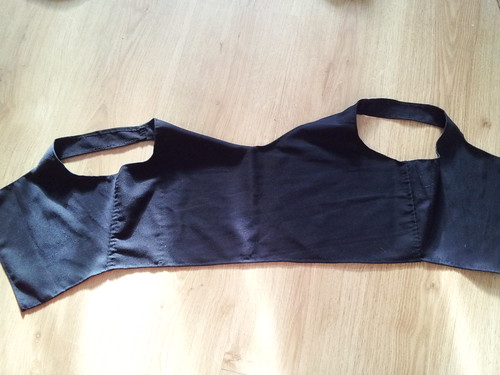
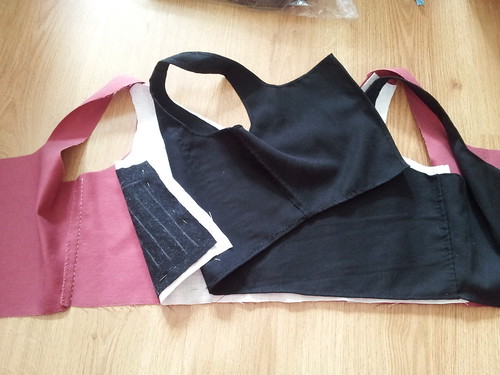
I have the lining assembled and hemmed. The outer shell is assembled, but will get hemmed over the interlining once it's finished. Current goal - pad-stitch ALL THE THINGS!
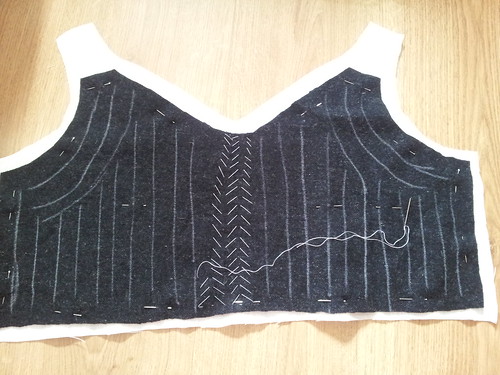
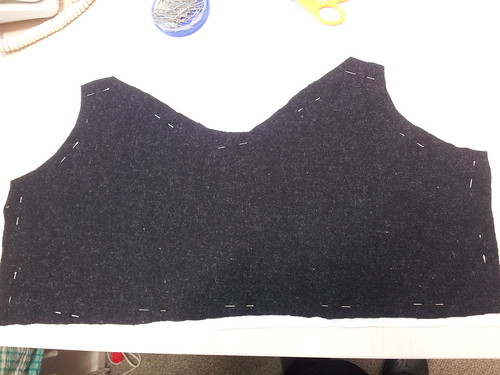
(I attempted to do the pad-stitching freehand. Yeah. That didn't work so well. Sewing straight lines over a curved plane is hard. I've now chalked guidelines, so it should hopefully work better.)
[1] "Period" is SCA shorthand for "stuff that we can document as having happened or existed in Europe before 1600". Also, sorry, Boss Laurel. Bad apprentice, no cookie. (She scolds me for describing things as period.)
[2] You know you've got the historical sewing bug when you choose a construction method based on whether or not you can disassemble the whole thing in order to better wash it.
No comments:
Post a Comment