Saturday, 13 June 2015

A digression into rectangles

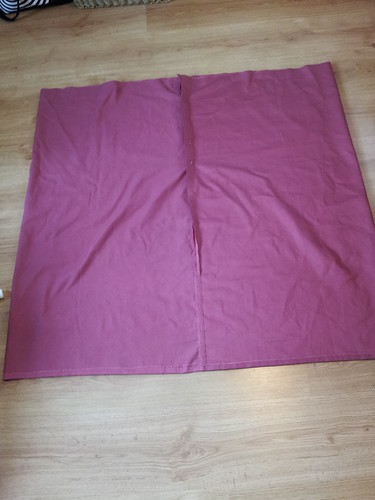
Work on the bodice continues apace, but it occurred to me that I'm going to need a skirt in order for this project to become a dress. Everything I've been able to track down seems to indicate that the skirt ought to be a single rectangle of fabric, hemmed at the bottom and gathered at the waist to fit into the bodice. That actually works well with my fabric, as I had only just enough to cut out the bodice pieces and leave three long panels for the skirt.

I can't sew the tube all the way shut until the bodice is done. I'm going to need to be able to pull it on over my head, and I may need to create a placket of sorts at the top of the waist to give me enough room. I wanted to get it hemmed, though, so I've partially sewn and finished that last long seam to allow me to do so.


For now, back to the bodice. 

Friday, 12 June 2015

Bodicing, now with actual fabric content!

Or, the Fiend found her pink sewing thread and there was great rejoicing.

I'm deep into the process of assembling my experimental bodice at this point. Inevitably, it's rather more complicated than I'd expected. Totally vindicated on my decision to make an entire practice dress before playing with the silk.

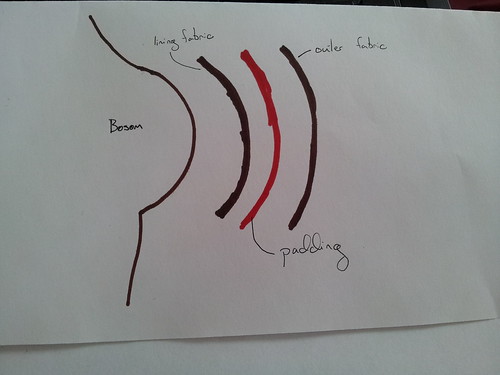
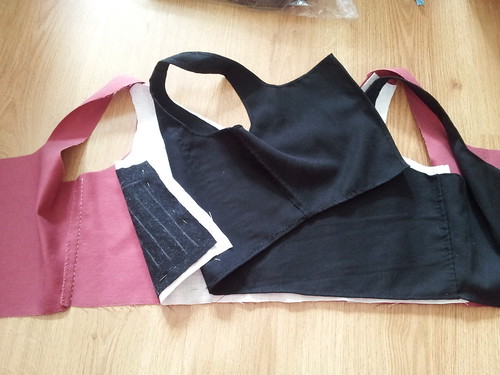
Take the fabric sandwich, for example. You've got your outer shell of fabric, which is what people will be able to see when you're wearing the dress.


You've got your lining.


And then there's the padding sandwiched in between the two.


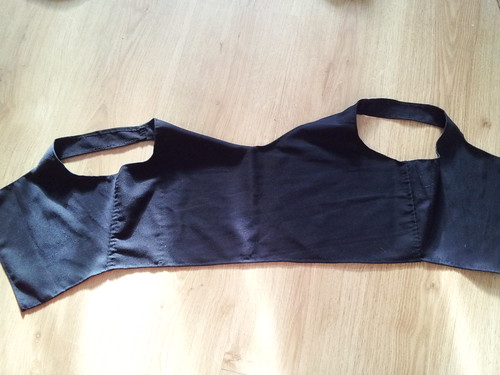
Because I'm doing all of this by hand rather than with a machine, I'm able to use the "period"[1] construction method of assembling the outer shell and lining separately, hemming each of them, and then whipping them together all the way around the edges. It makes for much smoother joins and also means that the lining is removable (and therefore can be washed separately[2]).

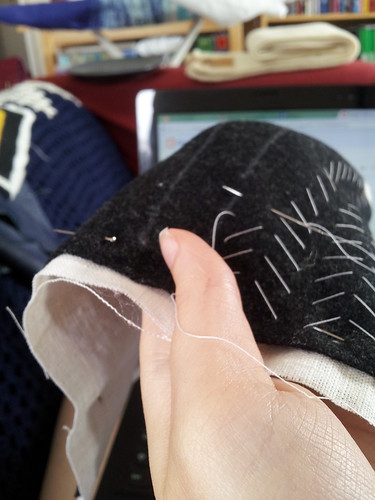
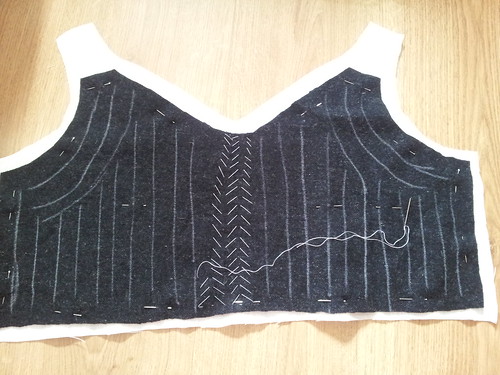
My original plan had been to sew the padding directly to the shell of the lining. No dice, though. You see, when you're pad-stitching, the fabric layers pick up a slight curve from being draped over your hand.


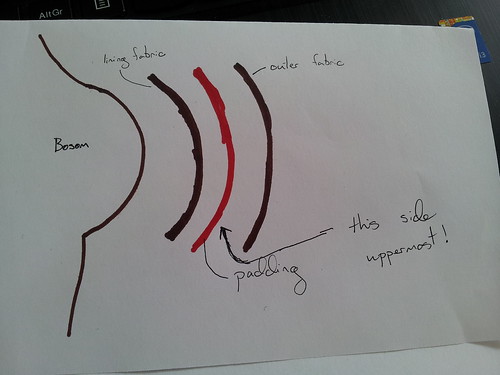
That curve needs to follow the curve of the body. In this beautiful diagram (or not!) you can see the curves of fabric over the bosom.


When pad-stitching, you work with the outside edge of the curve uppermost in your hand, as indicated by the arrow:


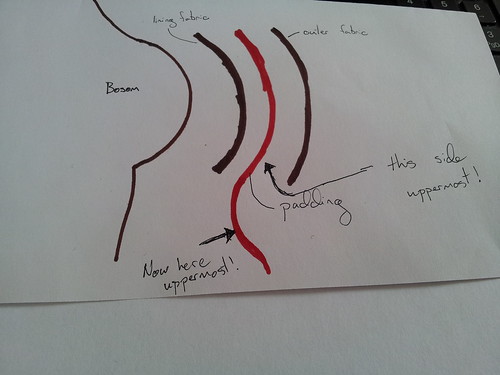
However, bodies go out AND in. We are not spheres. (Thankfully - just think of all those curved seams to make clothing!) Imagine, then, that the line of fabric continued down the body and dipped in under the bustline before going out again. You'd need to pad-stitch from the opposite side of the fabric.


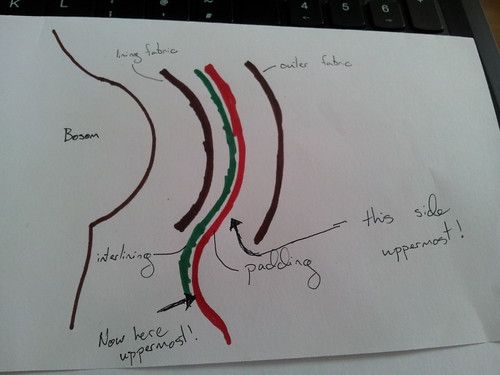
If you were attaching the padding directly to the lining, you'd get unsightly chicken scratching thread lines all over the inside when you swapped to the reverse for the curves, and that wouldn't do at all. Fortunately there's a solution - more fabric!


Instead of attaching the padding to the lining, you attach it to an interlining (shown in green above). That way you can sew the curves from both sides and then it all gets hidden between the outer shell and lining fabrics. Delicious, delicious fabric sandwich. Mmmmm, interlining...


Anyway.

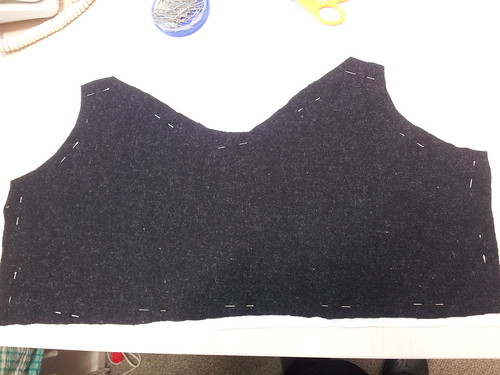
I have the lining assembled and hemmed. The outer shell is assembled, but will get hemmed over the interlining once it's finished. Current goal - pad-stitch ALL THE THINGS!


(I attempted to do the pad-stitching freehand. Yeah. That didn't work so well. Sewing straight lines over a curved plane is hard. I've now chalked guidelines, so it should hopefully work better.)

[1] "Period" is SCA shorthand for "stuff that we can document as having happened or existed in Europe before 1600". Also, sorry, Boss Laurel. Bad apprentice, no cookie. (She scolds me for describing things as period.)

[2] You know you've got the historical sewing bug when you choose a construction method based on whether or not you can disassemble the whole thing in order to better wash it.

Tuesday, 9 June 2015

Constructing the bodice

The lack of extant clothing from this period of Florentine history means that a lot of conjecture has to go into making versions of it. One of the great mysteries of the high renaissance in Italy is how to create a supportive bodice that doesn't buckled under the weight of one's cleavage while still maintaining the soft, curved silhouette seen in portraits. Foundation garments? Boning? Something else?

While some of the portraits in my inspiration pile have a layer in between the linen camicia and the laced outer

File:Mazziere, Agnolo di Domenico del — Bildnis einer jungen Frau — 1485 1490.jpg
Photo from Wikipedia


some clearly do not.

Selvaggia Sassetti (born 1470)
From the Metropolitan Museum of Art


While it's entirely possible that some sort of foundation garment was worn under the camicia, I have no idea what it might have looked like or how to construct it, so I'm going to go with just the camicia.

To me (and I'll be the first to admit I'm not an expert) it looks like these dresses aren't boned in the bodice. I have clothing with boned bodices, and there is always a shelf effect at the top. It's a result of the boning not following the curve of the body. All of the portraits I've found with this style of clothing lie flush against the skin.

What I'm going to attempt, therefore, is the same construction method used to make shaped doublets. In between the outer fabric and the lining I'm going to use wool felt and pad-stitch it to create gentle shaping over the bust. My theory is that the layered felt will be stiff enough to keep the bodice in shape while still molding to my body. It should also minimize wrinkles and buckling under my bosom.

Of course, I've never actually made a doublet in this manner. Before I start playing with the red silk, I've decided to make a practice version of the dress. It'll use the same construction method, but cheaper materials - in this case some cotton canvas, leftover wool from that cloak I butchered a while back, and cotton taken from an old skirt. That way I'll be able to make all the inevitable screw-ups and see how the dress wears in time to correct the problems in the "real" dress.

Friday, 5 June 2015

Bodices and Florentine portraits

I have an ample bosom. The most challenging part of any sort of fitted garment is always going to be the bodice, especially in situations like this where I won't be wearing any modern foundation garments underneath. Of course, I've never actually made any sort of structural bodice, and even if I had there aren't any extant garments from this period to get patterns from.

Ah well, nothing like a challenge, right?

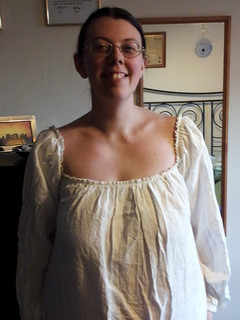
Weaving Friend came to visit and showed me her trick for starting a bodice block: using a pillowcase. It's already a torso-shaped tube, so the "careful" application of scissors, Sharpie, and pins resulted in something resembling a bodice.
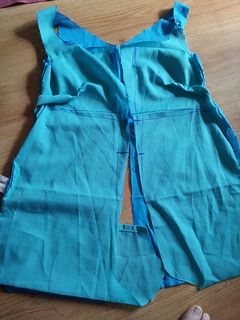


Incidentally, having someone walking around your body with a pair of fabric shears is pretty scary. Fortunately Weaving Friend is pretty awesome and only a little scary.

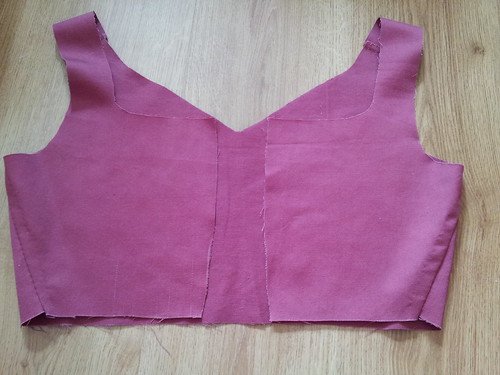
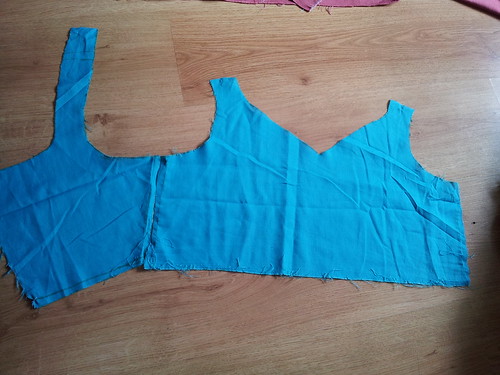
Once we'd gotten this made, I made a second block from the same polycotton bedding as the pillowcase. It's too flimsy to do any of the structural experimentation, but it's good as a way to measure things like the length of the straps.


Next up, the block for fitting and lacing. This one is made of a denim offcut I bought years ago. It's not what I'll be using for the garment, but it's heavy, stiff fabric, so I can get a sense of how the lined bodice will behave.
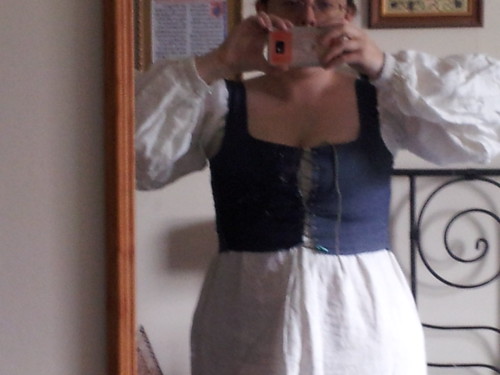


There are some wrinkles under the bust, but not too many. What is very obvious in this picture is that I've cut the front panels too wide. There should be a gap of several inches between the laced fronts, but they meet in the middle all the way up.
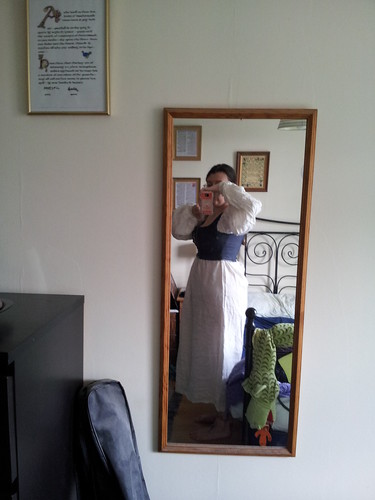


The side silhouette is pretty good, though looking at it I think the armscyes are too far forward. If I trim about a centimetre off the side seam on the front panels, that should fix both the armscye placement and the front opening. The straps are also too long. There ought to be a little more lift than there is.

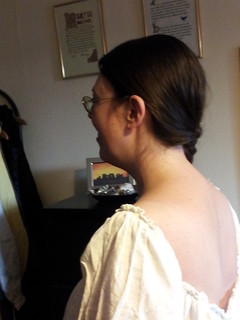
And finally, the back view.
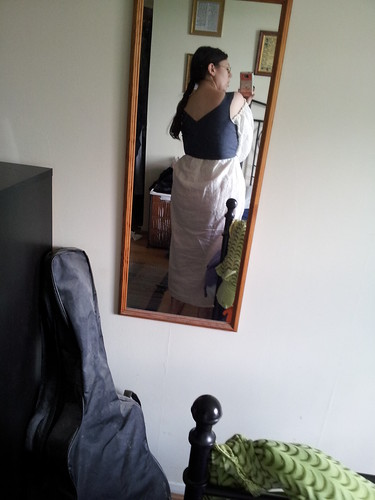


This is where you can see the only real issue with the German chemise. There aren't any gores, which is what's causing the weird bunching over my butt. Other than that, the length is pretty good. And the bunching won't be visible once there's a skirt attached to the bodice.

You can see shoulder seams in this portrait:

http://upload.wikimedia.org/wikipedia/commons/thumb/5/5c/Sandro_Botticelli_-_Ritratto_di_giovane_donna.jpg/159px-Sandro_Botticelli_-_Ritratto_di_giovane_donna.jpg
Botticelli, c. 1475
They are pretty far in the back, which is what I've done with the block in the above photos.

The composition of the original painting, along with the style and dress, suggests to me that it is most likely from the workshop of Ghirlandaio, giving it an approximate date of of 1480-1494. See how similar they look?

Florentine painter Portrait of a Lady Technique: tempera on panel Measurements: 69 x 46 cm Date or Period: c. 1500 Item used to belong to the following collections:    family von Ingenheim  I suspect this painting is earlier than the estimate, based on dated Florentine portraits in this style of clothing. Current whereabouts of painting unknown.


Portrait of a Lady

This one even has a hint of a lace cap, too, and what looks like strings tied under the chin.

Helpfully, the original of my painting was last seen in the 1930s, but its current whereabouts are unknown. I'm going to try to track down the article in which it was cited, but that may take a while.
Thursday, 4 June 2015

And now for something completely different.

A while ago I found a painting on Pinterest. I was looking for something else entirely, but it grabbed my attention and I've not been able to get it out of my head since.

Photo taken from this website.


So, as a brief pause in the making of male Tudor clothing (musn't forget to post about the finished jerkin and puffy pants), I'm going to attempt some late 15th-century female Florentine clothing. You know, 'cause I have all that free time.

I've never made anything like this before, so the first attempt is probably going to be All Wrong. We'll see. First step is research. I've spent a chunk of my day collecting paintings of women in similar clothing. The first thing I've noticed is that the approximate date of this painting seems to be about 10-15 years off. Paintings of women in this style all appear to originate in the 1480s and 1490s, so I'm going to work with that.

Components

Of course there's a linen chemise (which I ought not to call a chemise but a camicia), because I need more linen undergarments in my life. The Tudor shirt won't work, since the neckline is radically different, but I do have a German chemise that goes under a Cranach gown that has disappeared somewhere in my mother's house. It has the round neckline and the puffy sleeves, and although it's gathered into a slight ruffle rather than a whitework band, it'll do as a starting point. (Did I mention I'm hoping to pull this outfit together by the beginning of August?)


Hmm. Possibly I need more sun...


Some of the portraits have some sort of contrasting panel over the camicia underneath the bust lacing. Some clearly don't, based on the way the layer of white fabric is bunched up. Since I'm going to be wearing this in August, I'd rather have as few layers as possible.

Over the camicia I'll be wearing a gown with a front-lacing bodice, then. I'm not entirely sure what's going on with the bars at the top of the laced opening. They look like brass rods, and then lacing cord underneath with some sort of brooch/ornament/flower tucked under.

The sash and sleeves look to me to be made of black velvet. The sleeves are in two pieces, laced together at the elbow and forearm. It's not clear how they're attached to the dress. They do seem to be attached only at a single point, though, which to me implies that they are either pinned on or laced on. If they were sewn there would be more of a flat seam than the single point of connection that's visible here.

There's a sheer silk partlet over the top of the bodice.

She's wearing a round pendant that appears to be metal, strung onto some sort of black cord that's looped twice around her throat. She also has on a single ring that appears to be set with a stone or stones.

She's got a really unusual cap on. Although the hairstyle is what seems to be the usual Florentine 'do for this period, the caps are usually plain linen. This appears to be either lace or sheer embroidered silk.

And although they're not visible, I will need some sort of shoes and stockings. More research there, since I've no idea what would be appropriate.

Eventually I'll need one of the loose overgowns, too. Not by August, though. I'm ambitious, not insane.

Sossidges*

The event of cookery went well - the food was served at the right temperatures and on time, everyone seemed happy with it, and we hit the sweet spot of just enough leftovers that people had clearly eaten their fill but not so much there was a ton of wasted food. And the best part was that we in the kitchen actually had fun and got to participate in some of the other activities.

Rather than write up the whole feast as a single massive post, I'm going to do it one dish at a time. First up, fried sausages!

This is a slightly tweaked version of Peter Brears' sausage recipe (2015, p. 356), which is itself an amalgamation of three 17th-century recipes. I've increased the amount of black pepper, because I find that fatty sausages cooked in their own fat need the extra bite not to tasty greasy and gross.

  • 1 kg lean pork
  • 0.5 kg pork fat
  • 1 tsp ground mace
  • 1 tsp ground cloves
  • 1 rounded tsp ground black pepper
  • 2 tsp salt
  • 4 tsp dried sage
Coarsely grind the pork and the fat together through a meat grinder**. Grind all the seasonings together with a mortar and pestle until they are well mixed and of the same size. Pour over the ground meat and run through the grinder again to combine.

Brears recommends rolling the sausage meat out into logs if one isn't using casings, but in order to fit more into the frying pans I rolled them into balls instead.

Fry the sausages over a medium heat until they are cooked through and nicely browned. I didn't add any extra fat to the frying pan, as without casings some of the fat from the meat inevitably renders out.

Yield: about 100 walnut-sized sausage balls.

These may well be the tastiest sausages I've ever eaten, and as my mother used to make her own, I've tried a lot of different kinds.

*A Pratchett-ism that has slipped into the family lexicon.
**You could of course just mince the meat by hand, but if there's a meat grinder to hand I'd use that. It's faster. Alternatively, go find a nice butcher, give them your spice blend, and ask them to grind up the meat in the right ratio with the spices.

Sunday, 24 May 2015

Experimental biscuitry

I am at the tail end of preparing for the event of cookery and I've just one recipe left to test. It's for the nibbly dessert biscuits, and is the only recipe I'm redacting from the original myself.

Take a quart of life Hony, and set it upon the fire and when it seetheth scum it clean, and then put in a certaine of fine Biskets well serced, and some pouder of Cloves, some Ginger, and powder of sinamon, Annis seeds and some Sugar, and let all these be well stirred upon the fire, til it be as thicke as you thinke needfull, and for the paste for them take Flower as finelye dressed as may be, and a good peece of sweet Butter, and woorke all these same well togither, and not knead it. 

(Originally published in 1584.)

I'm interpreting that as:

  • Boil and skim a quart of honey
  • Add biscuit crumbs
  • Add ground cloves, ginger, ground cinnamon, aniseed, and sugar
  • Cook until thickened
  • Make pastry out of flour and butter
Since you wouldn't eat flour and butter paste, I assume one would then roll out the pastry, fill it with the cooked honey mixture and bake the resulting nibbles until they're done.

There is no leavening agent in this recipe, so the resulting biscuits are going to be very dense. It's almost going to be a spiced candy paste wrapped in pastry. Hopefully it'll taste good!

The ingredients are almost identical to those for lebkuchen, and I have a good recipe for those to indicate proportions.

For the trial batch:

  • 1/2 cup of honey
  • 1/3 cup of sugar
  • 1/2 tsp each of the spices
  • 1/3 cup of crushed Digestive biscuits.
  • Regular pastry, including water to hold it together.
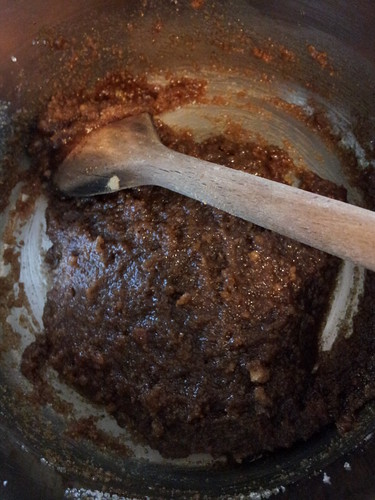
I warmed everything over the lowest heat on my cooker top. It being commercially-available honey, there wasn't much scum to remove, so the cooking went quickly. I added the sugar last, at which point it thickened up really quickly. And once it came off the heat it started to solidify almost immediately. On the day I'll need to make and roll all the pastry in advance so that I can assemble them before the filling gets too hard to work with.


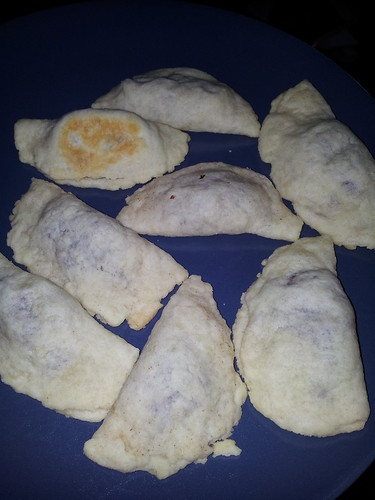
They need 10 minutes at 400F/Gas7 to cook the pastry. The filling reliquified on cooking, but I think I overcooked the filling. It really ought to have stayed soft. The ones I tasted fresh from the oven are delicious, though! The trick is going to be making sure I stick with soft ball temperatures.