Sunday 29 March 2015

Making a Tudor shirt, part 7 - inserting neck gussets

A feature of several extant shirts is the use of gussets in the neckline. Whether a cut in the fabric of a single-piece body or the endpoint of the shoulder seam, it's structurally weak and subject to a lot of tugging and abuse during wear. So, while fiddly, it's worth the effort of putting them in.

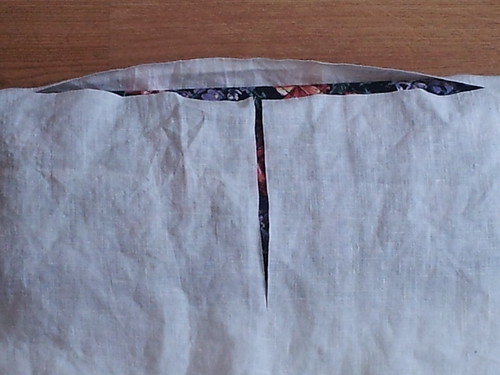
Neck gussets are little right triangles of fabric sewn into the short sides of the t opening of the neckline. (Quilting types, these are half-square triangles.)

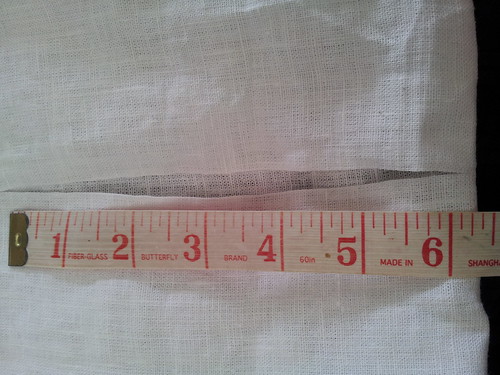
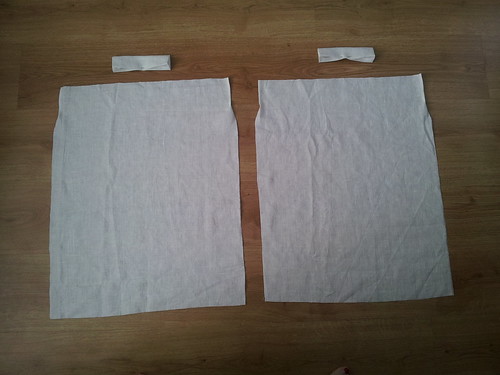
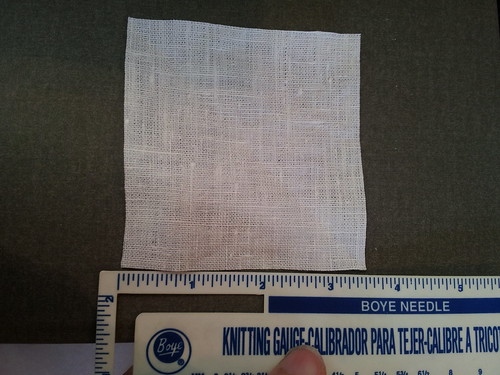
Cut a square of linen that's about 3.5 inches on each side.


Fold in half corner to opposite corner, finger-press the fold line, open it back up and cut along the fold line. You now have two triangles.


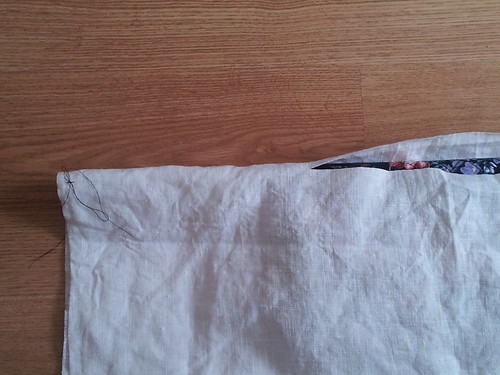
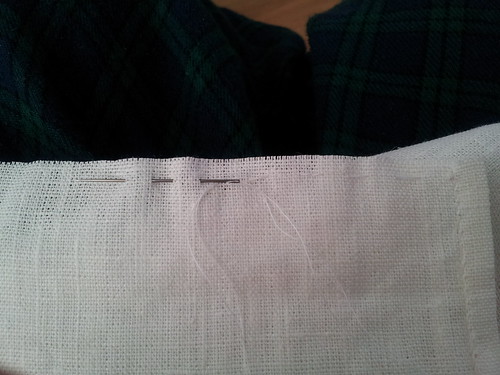
Working on the RIGHT SIDE of the shirt body, lay the first triangle up against the side of the cut in the shirt as shown below. The right angle of the corner is at the end of the cut, about half an inch below it. This is deliberate: you need a seam allowance here.


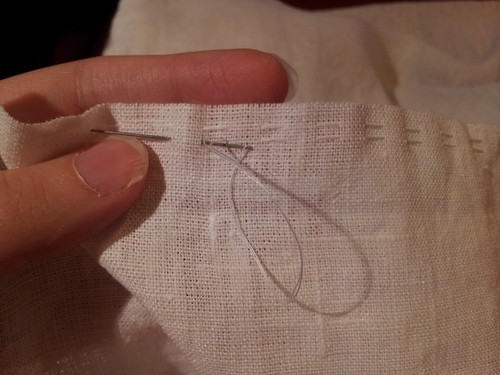
Starting from the end farthest from the bottom of the cut, sew the first side of the triangle to the shirt using very small running stitches. Make sure you start about half an inch in from both sides of the triangle.


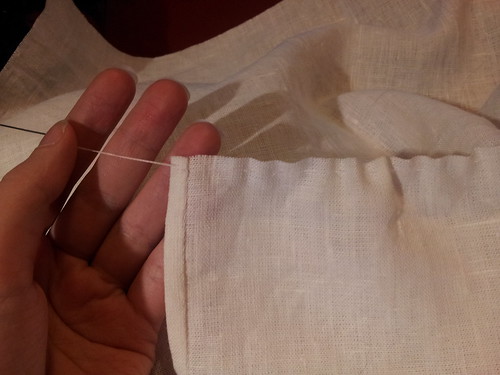
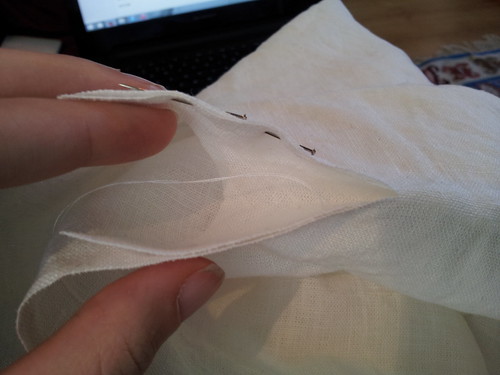
The next step involves some fabric gymnastics. Basically, the side of the triangle that's pointing away from the slit in the photo above (the one where it hasn't been sewn down yet) needs to be attached to the other side of the slit. You can do this by easing around the corner, but it's a pain and never comes out perfectly square. Instead, I do this. First, park your needle over by the neck hem so you don't stab yourself, then fold the triangle in half so that the two short sides are on top of one another.


Next, fold the shirt body along the shoulder "seam", right sides together. You now have a fabric sandwich with the doubled triangle inside the front and back of the shirt.


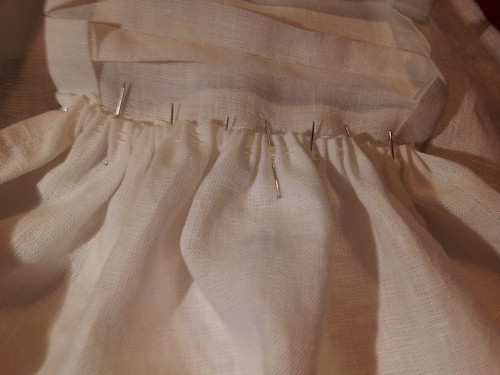
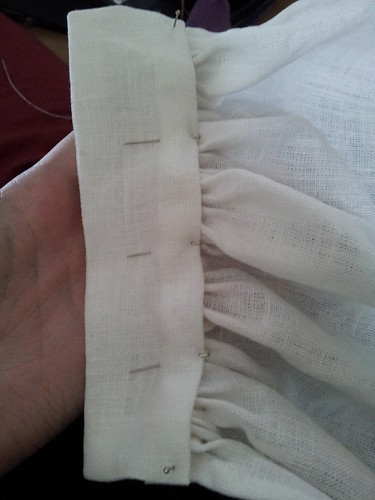
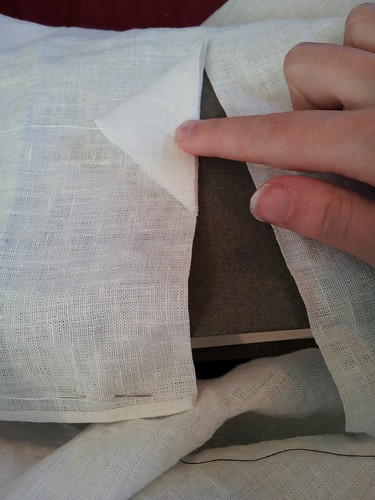
Being careful not to let the triangle slip, pin the unattached side of the triangle to the side of the slit. If you open up the sandwich slightly, you should find you have a v-shape with a layer of shirt and a layer of triangle on each side, triangle innermost.


Next, open up the sandwich and push the tip of the triangle into the centre of the sandwich.


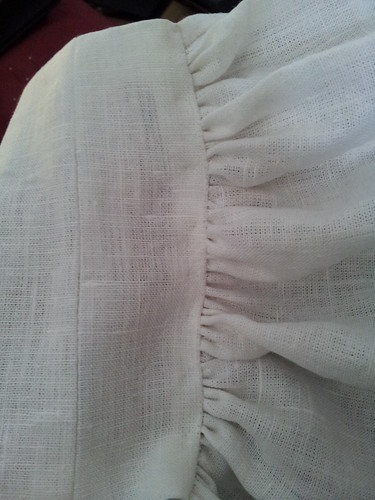
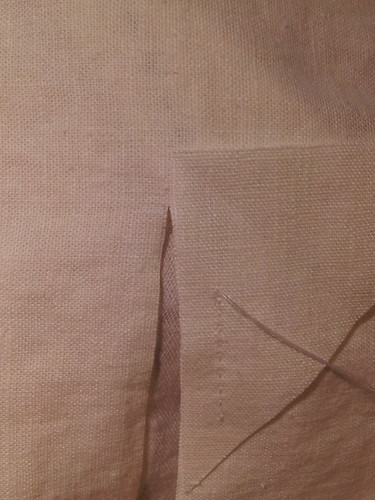
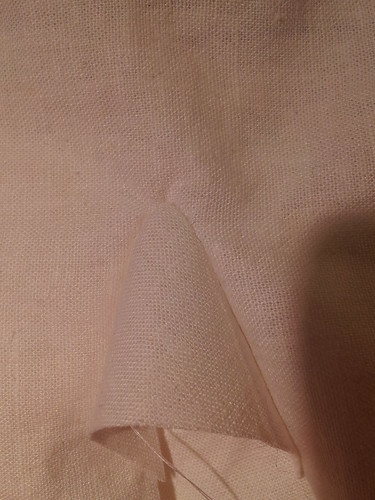
Unpark your needle and sew the rest of the way around the triangle. You won't be able to maintain the half-inch seam allowance as you go around the corner. If you try it, the fabric bunches up and looks ugly. Ease it in gently and it should be smooth on both the wrong:


and right sides:


Once the gusset is in place, the insides of the seams need to be finished. Extant shirts have felled seams here, so that's what I do. First, clip away the unsewn corners of the triangles, leaving enough fabric that the seam doesn't rip out.


Next, clip away about half of the seam allowance on the shirt, NOT on the triangle. Angle in from the outer edge of the slit on both sides so that you have a smooth line going into the seam, and when you get to the narrower seam allowance at the corner, don't clip it.


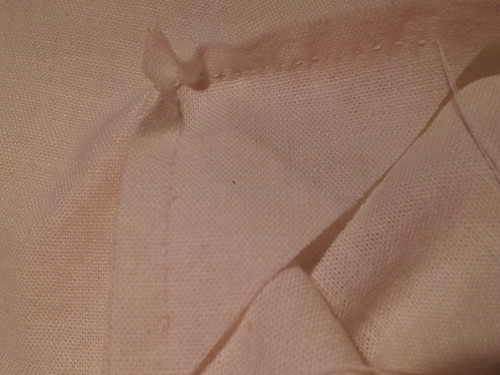
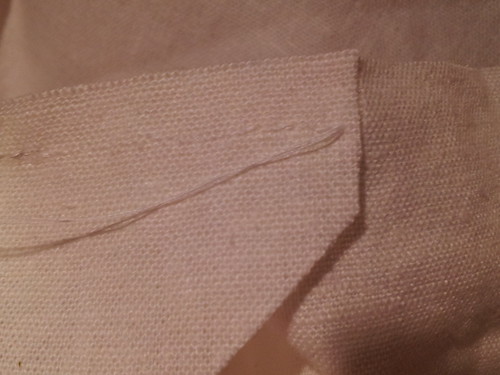
Fold the seam allowance over on itself twice and finger-press, as though you were hemming it, but tuck the clipped edge of the shirt into the folds so that the full seam allowance wraps around the clipped seam allowance. Whip the edge down exactly as if you were hemming.


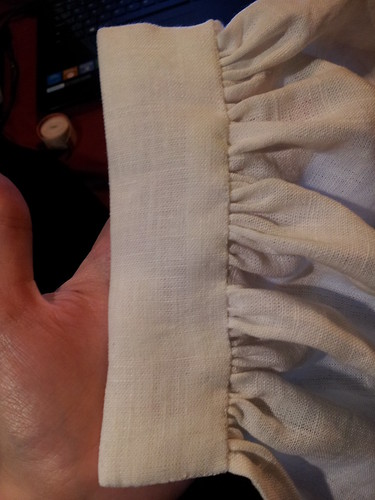
No funky mitered corners: just work along one side, then fold the other side under to make a nice, square corner. Fasten off your thread and admire your gusset.


And the right side:


Now go put in the one on the other side!


And they'll feast, feast, feast, feast!

Remember that medieval Arabic lunch I cooked last year? Well, I'm cooking for that event again this year. Only this year I'm not coordinating lunch. This year, Lady Co-Boss and I are between us coordinating the food for the whole weekend. Cue panic because the event's in 9 weeks and I need to test ALL THE RECIPES. (Well. Not the ones for Saturday lunch because I'm just repeating last year's.)

Conveniently, I have acquired a number of new cookbooks that I've been meaning to test. To that end I have begun planning! We've divided the meals for the weekend between us and invited two other attendees to deal with breakfasts. We'll share Friday night supper and Monday morning breakfast; I'm responsible for lunch and feast on Saturday while she'll be doing feast and supper on Sunday. Should work well. At least we won't be under one another's feet.

Lunch is going to be a repeat of last year's lunch. It was fun to cook and everyone seemed to enjoy it. The only thing I'm planning to change is making more flatbread.

The feast is going to be a little more complicated. The general sense of what makes a feast is that it should have a wider range of dishes and be presented beautifully, as well as possibly involving some sort of entertainment between courses. The entertainment is not my job, but I think I can handle the rest. I've decided on a Tudor feast, both because of the 1545 project and because I've a cookbook with redacted versions of Tudor recipes to work from. (Redactions being interpretations with amounts written in, they are much easier to cook from than recipes that call for "enough flour to make the dough".) The chap who's done the redactions is also the person who coordinates the food in the Tudor kitchen at Hampton Court, so while I'd eventually like to do my own redacting, I'm confident that his are a reasonably accurate starting point.

My personal preference is to have each course be roughly half meat and half vegetables or fruit, plus bread. After trawling through the cookbook, what I'm thinking at the moment is this for the first course:

  • a compound salad (greens, fruit, pickled things, flowers)
  • lamb stewed in beer
  • fried pork sausages
  • strawberry tart
For the second course:

  • beans fried in butter
  • meatball pears (not sure what meat yet)
  • cabbage cooked in stock
  • chicken and bacon pie
Currently there aren't any vegetarians booked. If any do come, I'll add individual alternative protein dishes of some sort to the first course and do some of the cabbage in vegetable stock. I've tried to minimize the number of dishes that use the oven, since the one onsite is notoriously fickle.

This evening I'm testing the lamb in beer. Recipe comes originally from a cookbook dated 1557. The recipe calls for a leg of mutton from which one removes the meat and slices it into thin strips. Since I'm not going to have any use for a bone I've gotten chunks, and since most people prefer it I've gotten lamb.


Basically, you throw the lamb, a sliced large onion, and a bottle of brown ale into a pot.


Simmer it for an hour, then throw in a knob of butter and some salt and pepper before simmering for another 20-30 minutes.


The lamb is fork-tender and flavourful. A bit bitter, though, so I'll need to pick a different beer. (Fantasy project - making the recipe with beer brewed from a 16th-century recipe.) The beer boiled over if looked at funny, so it'll need careful watching. Otherwise, complete success, definitely on the menu. 

Also testing out the filling for a strawberry tart. Recipe from 1665, but similar recipes appear in earlier cookbooks. I'm not worried about the pastry, so for today I was lazy and bought a prebaked shortbread crust. The tart filling is strawberries, red wine, cinnamon, ginger, and sugar.


You're supposed to arrange everything artfully in the pastry case and then bake it for half an hour, but I've just baked the filling separately and poured it over the crust for tonight's dessert.


Verdict - omnomnomnom. This is probably going to be added to the regular dessert rotation.


Friday 27 March 2015

Making a Tudor shirt, part 6 - the neck opening

If you're planning to embroider the fabric around the neck opening, it is far easier to do that before you start cutting and attaching the collar. If you do want to add embroidery, baste the lines of the neck opening in contrasting thread. Work the embroidery, remembering that you'll lose fabric all the way around the basted lines where you're either going to hem or gather for the collar. Once the embroidery is finished, follow the instructions below.

Press the fabric you're using for the shirt body. You can either use a single length of fabric for both the front and the back of the shirt body, or if your fabric is too short you can use two pieces joined at the shoulder. There are extant shirts in both styles. I'm using a single piece for my shirt, but I'll do instructions for both styles anyway. Check for flaws in the linen before you decide which section to use for the front: it's a pain having to either work around them or pick out and redo your work.

If you're using two separate pieces for the front and back, pin them together at the shoulders. If you're using a single length of fabric, fold it so that the back panel is longer than the front. Precise lengths on extant shirts vary, but what I've found works best is having the front panel end just above the knee and having the back end just below it. Hem the two short ends so that they don't fray.


The neck opening is T-shaped, with the horizontal line across the shoulders and the vertical coming down the front. Find the centre of the front panel (the easiest way is to just fold the fabric in half). Cut the front opening as long as you're comfortable wearing it - to the base of the breastbone is about right, but if you're uncomfortable with the Seventies sex god look or will be wearing a bra underneath, cut it shorter. I'm cutting mine six-and-a-half inches long.


If the shirt is in one piece, cut the horizontal openings. These should be about half the distance from the centre of the shirt to the shoulder. Conveniently for me, this distance is also about six-and-a-half inches.

If the shirt is in two pieces, use running stitch to sew the shoulders together, leaving the centre of the two pieces open the same length as the cuts indicated above.


Once you've cut the horizontal openings, follow the line of the cuts to the edge of the shirt and mark it with either a pin or basting thread. It's nothing to do with the collar, but when you attach the sleeves you can centre them on the marks. Much easier than faffing around with the finished collar trying to make sure the sleeves are attached in the same place on both sides.

(This step is only applicable if you're making a one-piece shirt. A two-piece shirt has built-in markings from the shoulder seams.)


At this point you have a choice. You can either leave the neck opening as a T-shape, or you can trim it to give it more of a curve. Both options appear in extant shirts. I prefer the T-shape because it's easier to sew fabric that's been cut straight on the grain.

If you're making a two-piece shirt, press the shoulder seams open so that they lay flat. Hem the sides of the neck opening. (Make sure you're making the inside of the hem on the same side as the hems on the short edges!)

The bottom of the slit is a bugger to hem.

Thursday 19 March 2015

Antithesis

After I finished those grey socks back in January, I needed some socks that weren't grey. The spouse suggested using up my next oldest sock yarn. Since it happened to be a delightfully loud minty lime green, I went with it. These are the results:


Pattern is Nancy Bush's Anniversary Socks. Yarn is sKnitches Kettle Drum in Aegean. I'm not sure how long I've had it, but I added it to my Ravelry stash in 2008.

I've not actually cast on anything new since finishing these. I'm decluttering, and since most off my clutter is WIPs it makes no sense to start a new project.

Saturday 14 March 2015

Suddenly, a hat!

Sometimes after finishing a big project I end up with a hangover. Not a literal one, a figurative one. I look at all the stuff I'm working on and just... can't.

At times like these I need a mental cleanser. Something quick and easy to remind myself that not all projects are ten-year commitments. Thus, the newest baby hat:


One of the ladies in our SCA household is expecting her first, and I thought wee Nemo needed a hat. This is another pixie hat, this time out of leftover Noro Kureyon Sock (about 100 yards).


I think this may be the cutest one I've made yet...

Thursday 12 March 2015

At long last

It will come as no surprise that I am prone to taking on Very Large Projects. Wedding dresses, embroidered Tudor shirts, enormous research projects... I love them all. Consequently, there are a number of WIPs whose age is measured in years rather than weeks or months. Today I finished one of them.


This is a piece of cross-stitch I've been working on for longer than I've been married. (We celebrate our tenth anniversary next January, to put that in perspective.) It's absolutely enormous, more than a foot wide. DMC cotton on 28-count linen, plus the staff and the bands at the bottom of the cloak are in gold metallic floss.


This is one of those rare occasions when I make a project that is very much not to my taste. It's a gift for my grandmother, who chose it but didn't make it herself. It'll be off to the framer's soon, and then I'll give it to her for her birthday in May.

For now, though, I've got a new sewing machine (did I mention the sewing machine?) to put through its paces and a couple of sexy little fat quarters that want to become some sort of bag...

Thursday 5 March 2015

Thursday night in photos


Tools of the trade


Poor little sock


Awaiting my assistance

Leftovers for darning

Danger Mouse takes good care of my tea

An old favourite in the background


Sunday 1 March 2015

Making a Tudor shirt, part 5 - attaching the cuffs

At this point, you should have two assembled cuffs and two sleeves with hemmed plackets.


The wrist end of the sleeve is significantly wider than the cuff, so it needs to be gathered in. The gathering process is what gives Tudor shirts those delightfully puffy sleeves.

Starting just inside the hem, about an eighth of an inch down from the raw edge, work a line of running stitch across the wrist end of your sleeve. Keep the stitches as even as possible, and preferably work them parallel to the same thread the whole way across.


When you get about halfway across, you're going to find yourself running short of thread. DON'T FASTEN IT OFF. Instead, carefully slide the fabric along the thread so that it bunches up, being careful not to pull the knot through the fabric.

Finish working the line of running stitch all the way to the second hem. Again, don't fasten the thread off. Leave the free end dangling, making sure you don't pull it back out of the fabric. (I generally leave my needle attached to the thread at this point because it's less likely to pull back out.)


Work a second line of running stitch parallel to the first one, another eighth of an inch in. Line up the threads as exactly as possible so that the second thread goes up and down at the same points as the first thread.


When you finish the second line of running stitch, get your cuff. Carefully slide the fabric of the sleeve along the two gathering threads until the bunched-up fabric is exactly the same length as the cuff.


As you can see the gathered fabric wants to curve around. If you're finding it difficult to match the length of the cuff as a result, err on the side of gathering too loosely. Too loose and you can always ease the gathers tighter. If the gathers are too tight, they won't fit the cuff.

Arrange the gathered folds of fabric so that they sit nicely. Mark the mid-point with a pin. (A sensible person would do this at the beginning, but I never remember until now.)


The open long edge of the cuff is going to be sewn down over the raw edge of the fabric, covering it and holding the gathers in place permanently. I sew the inside of the cuff down first so that I can fuss with the outside and make it look nice without having to worry about the fabric escaping.

So. Working on the inside of the sleeve (which is the side the hemming turns towards), pin one side of the cuff in place over the gathers. If you're using embroidered cuffs, make sure you're pinning the plain side to the inside of the sleeve. It should just barely cover both of the gathering threads.


Much as you did when hemming, whipstitch along the join, taking up a thread from the wrist gathers and a thread from the fold of the cuff.


Fasten off the thread and run it inside the placket hem. Turn the sleeve over so that the outside is visible and pin down the other side of the cuff.


Start sewing at the top of one short edge of the cuff and whipstitch all the way down the side, along the long edge, and up the opposite short side. As you sew, arrange the folds of the fabric so that they sit nicely.


Gather the second sleeve and attach the second cuff in exactly the same way.