Saturday 31 January 2015

Spinning and knitting in January

In further adventures of things that are not Tudor shirts, I present the two most boring projects I've ever made in the same month.

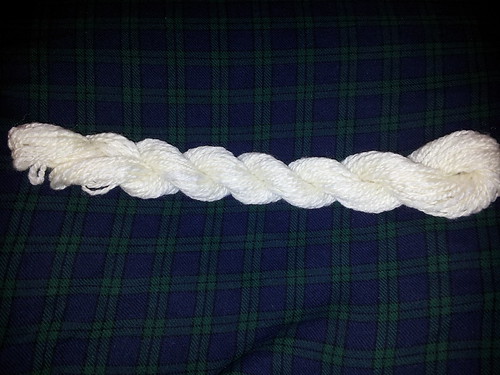
First, in an attempt to use up some of the random bits in my spinning stash, a hank of cashmere/silk, spun on a spindle and 2-plied using a plying bracelet. Still not keen on plying bracelets, but it's less effort than winding it off the spindle for something this small. About 25 yards of worsted-weight yarn.

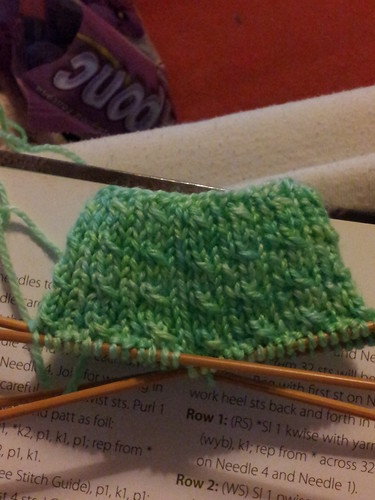
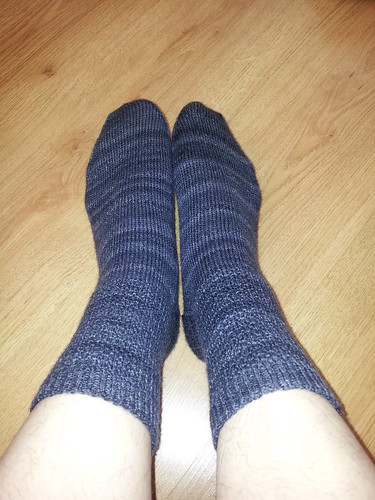
Second, a completed pair of socks that I started over a year ago. Ringwood ribbing for the cuffs and a plain foot. In charcoal grey on 2.25mm needles. YAWN.

The good thing is that this was the oldest sock yarn in my stash. Now that it's finally used up, I've cast on the next-oldest sock yarn - something that isn't grey or white!

Wednesday 28 January 2015

A little bit of crochet

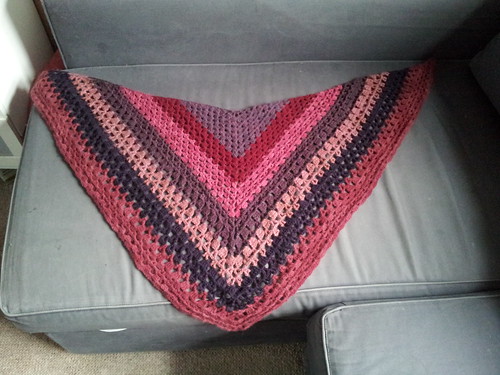
It hasn't just been all shirts all the time this year. I found myself a week and a half ago with a wild urge to crochet a shawl using some mill-ends I bought back in 2013. I'd planned to make a hat, maybe something stripey, but it somehow never happened.

Anyway. Variation on the basic granny square triangle, balls of yarn arranged in increasing size so that the stripes remained more or less the same width, crocheted until I didn't have enough left of each colour to finish another row. Also added an extra four rows at the end because I still had yarn left.

Sunday 18 January 2015

Making a Tudor shirt, part 4 - the wrist plackets

I had planned to do the neck opening and collar next, but it's complicated and I spent yesterday at an event doing archery and making merry. So instead, a chilled out session of hemming.

First, press the sleeves. (You're no doubt going to get tired of me going on about pressing. I get tired of pressing, but it gives much better results, so it's worth the faff.)

Next, hem the wrist placket. That's the opening in the side of the sleeve that lets you get your hand out through the cuff.

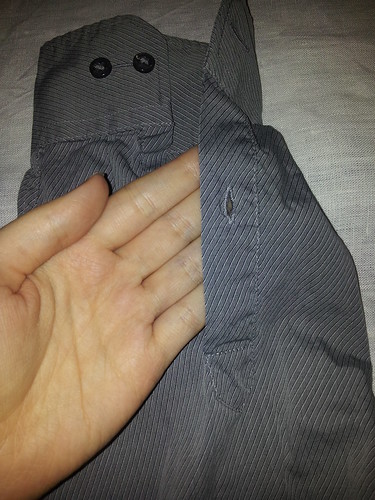
The wrist placket of a modern shirt


Unlike a modern shirt, where the underarm seam goes all the way to the wrist and the placket is cut into the intact fabric, the wrist placket of a Tudor shirt is worked as part of the underarm seam. Before the cuff goes on, the raw edges of the sleeve fabric need to be hemmed for the full length of the placket. On extant shirts the placket ranges from just over an inch to five inches; most are between three and four inches. My hands aren't much wider than my wrists, so I'm going to make mine three inches long.

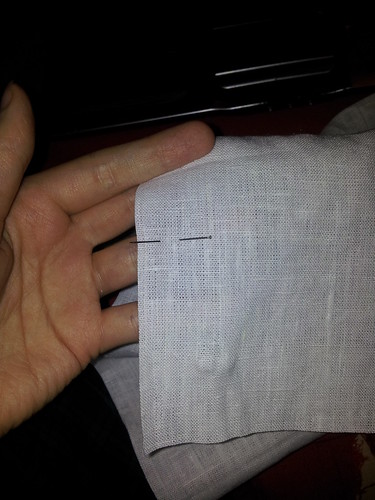
Making sure that you're measuring along the long side of the sleeve, place a pin to mark the length of your placket.

Bonus points for not stabbing yourself


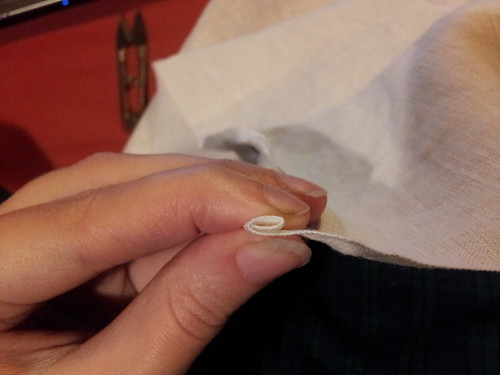
Press over the raw edge of the fabric along the length of the placket. I usually finger press all of my hems because I end up with straighter hems that way. If you are more skilled in the art of hot pressing, go for it.


Fold the fabric in again. This will completely encase the raw edge of the fabric.


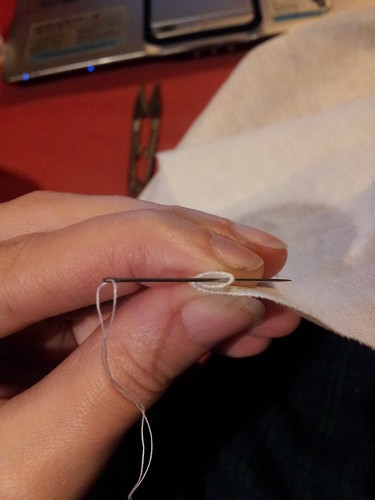
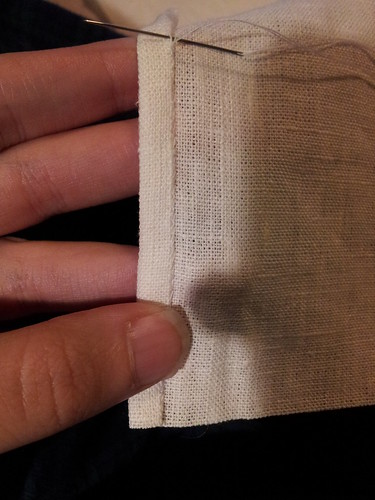
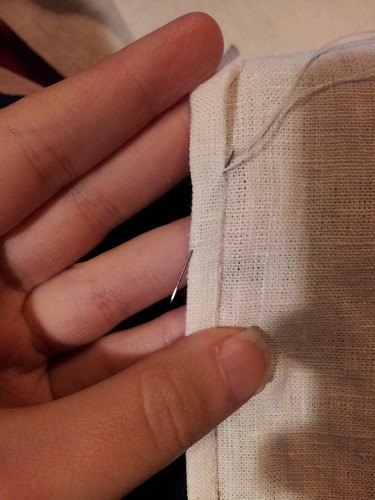
Insert your threaded needle into the opening inside the hem and out through the first fold you made. The needle should come out about an eighth of an inch away from the raw edge of the short side of the sleeve.


This will keep the knot at the end of the thread hidden inside the seam, and because it's away from the raw edge, won't pull out from the side.

Next, whipstitch the hem. I take one thread from the flat piece of cloth and one thread from the folded edge of the hem, and make one stitch about every eighth of an inch.


As I go along the hem, I always pick up the same two threads. This lets me keep the hem perfectly straight. It sound tedious, I know, but you get into a rhythm and it's done before you know it.


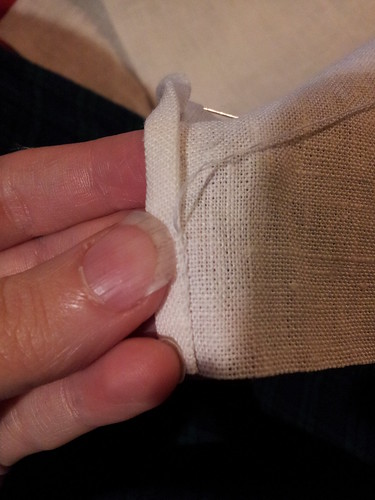
Once the hem is done, it should be all but invisible on both sides.


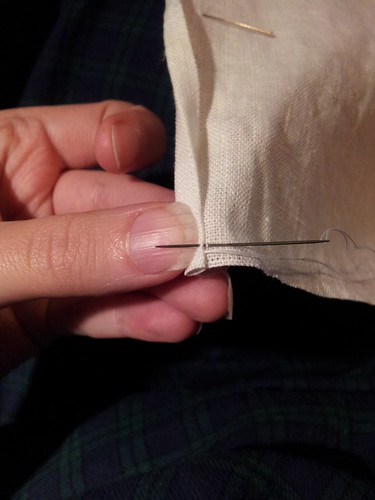
Tie off the thread. You can trim it off next to the hem, but I always worry about it coming undone, so prefer to bury the end in the hem. Push the needle into the fold immediately under the end of the thread, down the inside channel of the hem, and out the fold on the far side. Make sure you don't push the needle all the way through to the front the the hem - if you turn your sleeve over, you shouldn't be able to see the needle on the fabric at all.


Pull gently on the thread so that the fabric is ever-so-slightly bunched up.


Clip the thread off against the fabric and smooth the fabric out flat. This will pull the end of the thread into the hem.

Do the same thing on the other side of the sleeve, making sure that you put the inside of the hem on the same side of the fabric as the first hem! Then do the same thing for the placket on the other sleeve.

Wednesday 14 January 2015

Making a Tudor shirt, part three - collar and cuffs

The collar and cuffs are assembled in exactly the same way, so I find it easiest to do them all at the same time.

First, make sure you've finished any embroidery you want to put on.

Next, press the pieces. You want the edges to be perfectly straight, and it's MUCH easier if the fabric has been pressed first. If you've added embroidery, press it on a towel with the right side facing downwards. Cotton can be pressed at the same high temperature as the linen fabric, but if you're using silk you should turn the heat down when you're pressing over the embroidery.

Next, pair up the pieces of fabric. The right side of the embroidery should be in between the two pieces of fabric, because once you've sewn the first seam you'll be turning it over.

At this point you can pin the two pieces of fabric together so that they stay in line. I do for the collar because it's so long, but don't bother for the cuffs. Up to you.

Next you'll need to do a little measuring. Take your first cuff (both pieces) and wrap it around your wrist so that the excess fabric of the seam allowance is divided evenly on both ends:
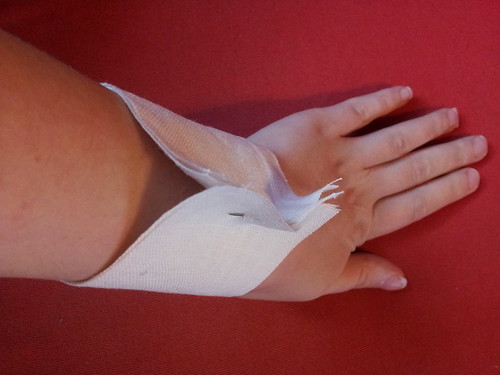
You don't need to pin anything at this point - I've pinned the ends together because I can't hold a loop shut and take a photo at the same time.


Fold the excess fabric first to one side and then the other, keeping the loop pinched tight against your wrist. Use your fingers to press hard on this fold and create a crease.
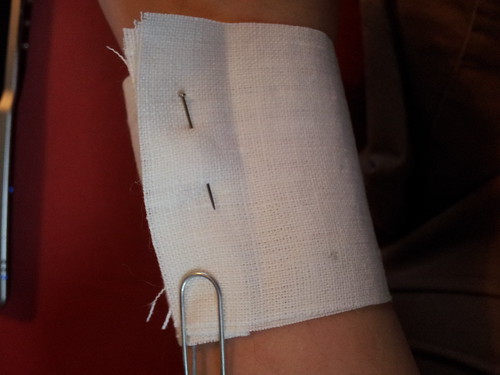
Same deal with the paperclip - it's a photography aid, not an instruction.


Unwrap the cuff from your wrist. You now have a cuff with a vertical crease at either end. The creases mark the finished circumference of the cuff.
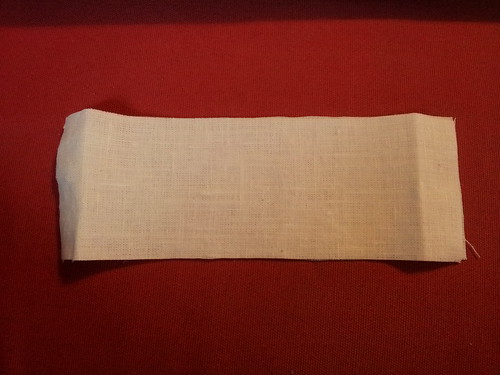


The next step is to sew the two pieces together. If your cuffs are embroidered, you are going to sew them together at the edge you want to be closest to your hand!
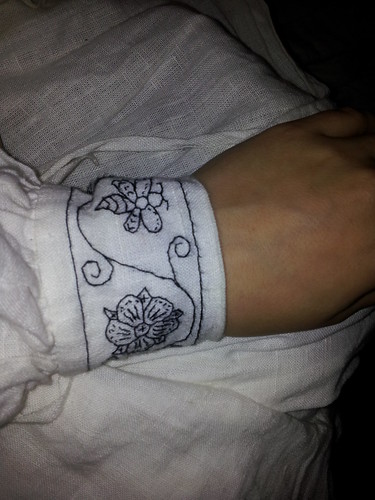
We're sewing the seam on the side of the cuff where my hand is.


Using running stitch, sew in a straight line from one crease to the other about half an inch in from the long edge.
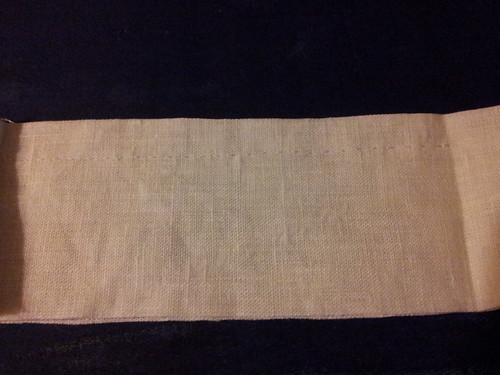


For the second cuff, you can skip wrapping it around your wrist and pinching - just use the vertical creases from the first cuff as a template. Sew the second cuff's seam in the same manner.

At this point, you're done with the sewing, but there's still a fair bit of pressing to do. First, press open the seam you've just made.
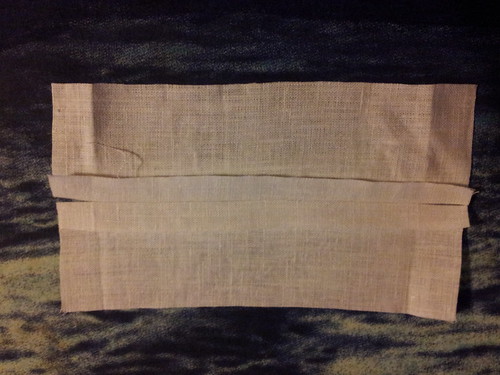


Next, turn the cuff so that the seam allowances are on the inside and press it flat along the fold.
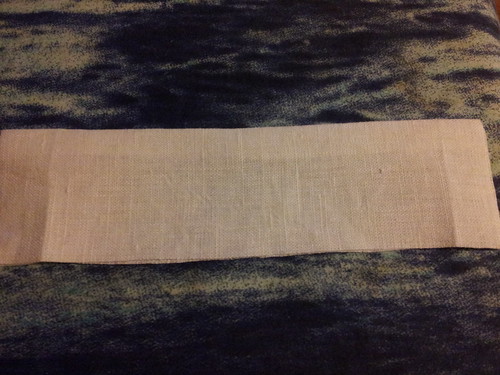


Next, open it back up and lay it flat with the right side facing down into the ironing board. Fold the short ends of the cuffs in, along the creases that you folded in earlier.
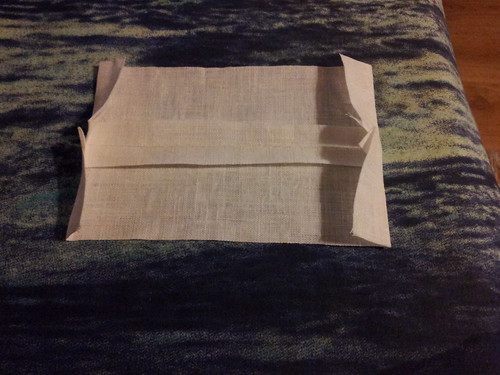


Close the cuff back up and press along the short sides and at the top corners. There's a lot of fabric folded up here, so be careful that your corners remain square.

Next, open it up yet again and fold half an inch of each of the long open edges in.
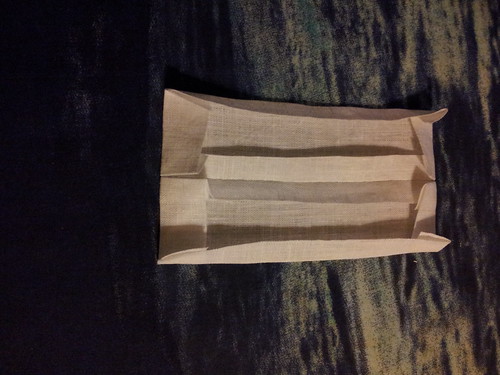


Finally, close the cuff back up and give it one last good press, paying special attention to the corners.
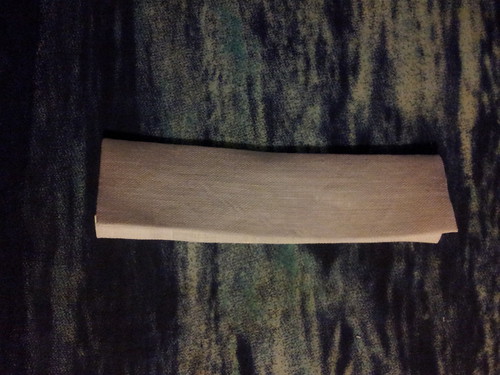


Press the second cuff, and then assemble and press the collar.
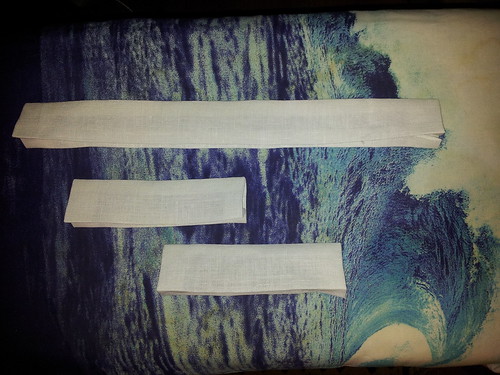


You won't do anything else with the collar and cuffs until it's time to attach them to the shirt body and sleeves respectively, so put them somewhere safe so that they won't get crumpled (but not so safe you can't find them).
Making a Tudor shirt, part two - planning the embroidery

It's much easier to add any embroidery to the shirt before you start assembling the pieces, so the next task is to decide which bits to embroider. Because my shirt is going to be a working shirt, I'm not adding any embroidery, but you might want to.

When worn, the only parts of the shirt that are visible are the collar and cuffs. (See, for example, this painting.) If you do want some embroidery, then, those are the parts that should definitely be embroidered. However, for something truly sumptuous, there are other places to add embroidery. These are:
  • The sleeves (either in columns or in an allover arrangement)
  • Around the neck slit on the front of the shirt
  • Across the upper torso, both in the front and in the back 
  • All the way around the rectangle of the body piece, close to the hem or seam
  • Occasionally, directly on top of any seams, especially on pieces with shoulder seams
As with the shirt of insanity, you can also work blanket stitching around hemmed pieces and lace them together. You can also hem the pieces and work direct insertion stitches, as was done in the example photo in part one of this tutorial. I'm going to be working plain seams, though, as they are simpler and less likely to catch on things.

The style of embroidery changes dramatically during the 16th century. Pieces from the 1530s and 1540s are very strongly geometric, with densely-stitched patterns that create a voided effect. By the end of the century, however, embroidery has become much more representative: plants and animals are clearly identifiable.

Tuesday 13 January 2015

Making a Tudor Shirt, part 1 - the fabric

A few people have expressed interest in parts of the process of making one of these Tudor shirts, so since I'm making another one at the moment, I thought I'd write it up as a series of tutorials. For the purposes of this series I'll be talking about men's shirts (as that's what I'm making), but in practice there is very little difference between men's shirts and women's shifts. Generally women's were longer, but not necessarily; indeed, some of the extant men's shirts were long enough to perform duty as a modern maxi-dress!

The first thing to do is select fabric for the shirt. Thus far, all the surviving shirts I've seen have been linen. It's perfect to wear close to the body and it holds up to wear very well, so if at all possible go with linen. The drape and thread count varies depending on the purpose of the shirt. Shirts for boys were generally of finer material than shirts for grown men, and the fancier the shirt, the finer the linen was likely to be.

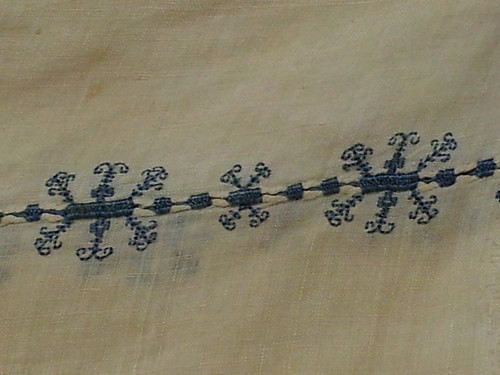
This:


is a detail from a shirt in the V&A dated c. 1540. The fabric is so fine you can see the embroidery on the back through the front.

My shirt, however, is going to be a much sturdier piece. I'm making it to wear while I'm shooting, so I don't want to have to worry about catching it on a hedgerow while I'm hunting for arrows and ripping it. I'm not embroidering it, either, because I expect to have to wash it more frequently than my other SCA clothing.

The amount of fabric will vary depending on how big a shirt you want. (No, really, Captain Obvious?) You'll need the following pieces:
  • The body (a single long rectangle)
  • 2 sleeves (rectangles)
  • 2 underarm gussets (squares)
  • 1 each of collar front and back (rectangles)
  • 2 each of cuff front and back (rectangles)

The front of the shirt should be from the top of the shoulder to just above the knee, and the back should be a couple of inches longer. Ideally you'd have this as a single length of fabric (most of the extant shirts are), but it's still correct to have shoulder seams and two separate pieces.

I've cut mine so that the width of the fabric twice (for the front and the back) is about 10 inches bigger than my widest measurement. Too baggy is better than too tight - too tight will rip when you try and take it on and off.

The sleeves should be the same length as your arm from the wrist to the shoulder. You'll get extra length from the cuff and the excess width of the body fabric at the shoulders, which will create the poofy effect on the finished sleeves. I've been cutting the sleeves about 18 inches wide - it seems to create a comfortable fit for the various adults who have tried it on.

The underarm gussets on the shirts I've made so far are about 5-and-a-half inches. I'm rather well endowed, so had expected I'd need bigger gussets, but actually they are plenty roomy and allow more than enough movement to shoot in.

The finished cuffs should be exactly the circumference of the wrists, and the collar exactly the circumference of the neck. A little gap at the front of the collar is ok, but I've not seen any portraits with overlapping collars. For each cuff and for the collar you'll need two identical rectangles of fabric about 2.5 inches wide and as long as your body measurements require. The 2.5 inches includes seam allowance - don't forget to add seam allowances to the total length, too!

The only pieces of the shirt that need to fit precisely are the collar and cuffs. Everything else is meant to be baggy, so if your fabric is a little wider, there's no reason not to use the full width.


Wednesday 7 January 2015

Let the Year of Selfish begin!

Happy New Year, everyone! It is officially the start of the Year of Selfish craft-along.

There are no deadlines and just one rule - have fun making stuff for yourself. If that means making things to sell to fund your other escapades, great. If it means working on reducing your stash, or working through your works-in-progress, awesome. If it means starting all those things you've been putting off forever, go for it.

Personally, I'm going to be working a little bit on all of those things. My enormous list of goals is going to take somewhere in the region of 3-4 years, but here are some highlights:

  • A complete outfit, c. 1545, for shooting in
  • Finally finishing my Yule Shawl (started more than two years ago!)
  • Knitting a shawl for a friend's wedding, from fancy stash I bought and have been hoarding
  • Restocking my sock drawer
  • Washing and spinning up some of my fleeces
  • Making a quilt
Basically, I want to have a year balanced equally between finishing stuff in progress and new projects, while reducing the overall volume of my stash.